Hallway Paint Refresh

Remember our bathroom remodel? So light and pretty!

LampsPlus Monroe Adjustable Wall Sconce

All of a sudden, the beige hallway felt drab in comparison. The yellowed color just seemed “dirty” next to all that glam. Hey! It’s nothing a quick coat of paint can’t cure!

Hallway before:

hallway refresh @diyshowoff #frogtape


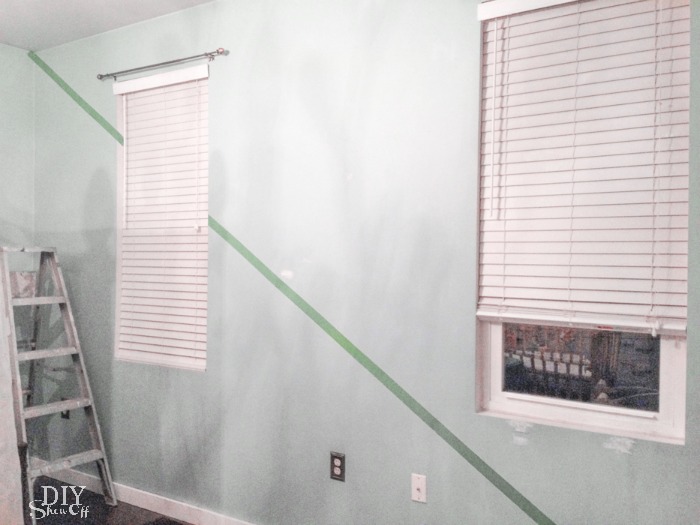
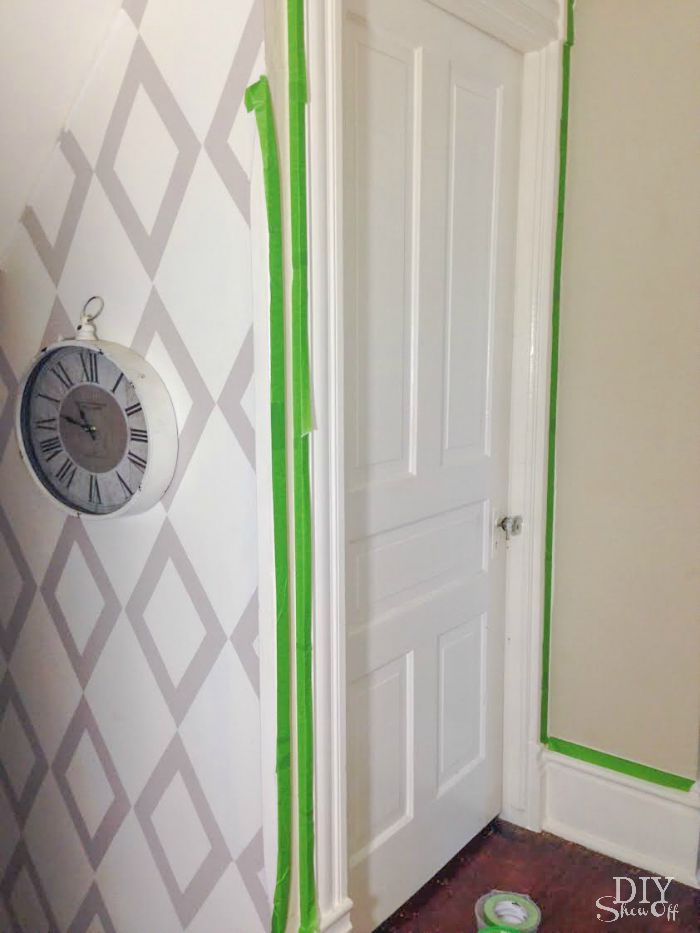
A lot doorways in one small area means a lot of trim in this old house so FrogTape® MultiSurface is a must have for creating crisp clean lines, especially in hard to reach spots.

Tape off trim in hard to reach areas.

hallway refresh @diyshowoff #frogtape


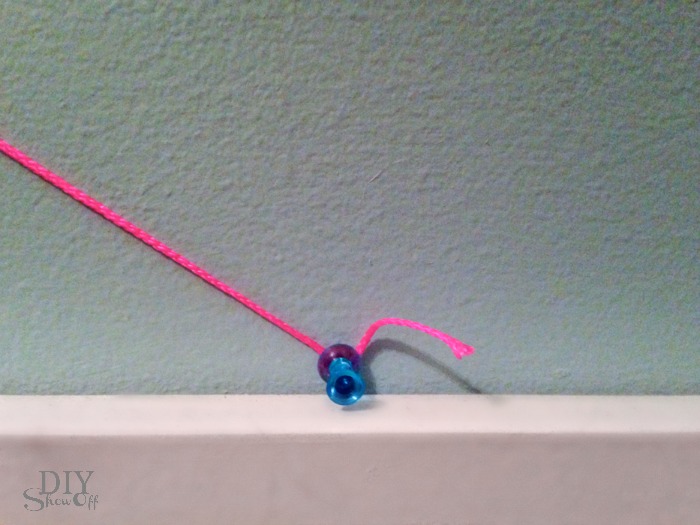
Burnish edges of tape using thumbnail to activate the Paintblock technology and begin painting.

hallway refresh @diyshowoff #frogtape


The difference is subtle when all is said and done but you can see how much brighter the new wall color is during the progress…

hallway refresh @diyshowoff #frogtape


While the second coat of paint is still wet, carefully remove FrogTape by pulling away from paint.

hallway refresh @diyshowoff #frogtape


After:

hallway refresh @diyshowoff #frogtape


I love how clean and fresh it looks and since there is no natural light in this space, the new light color makes a huge difference to me.

hallway refresh @diyshowoff #frogtape

before…

hallway refresh @diyshowoff #frogtape


after…

hallway refresh @diyshowoff #frogtape


Of course you know what I see, right? A big blank canvas for a future painted accent wall using FrogTape! To be continued!

I received compensation to complete this project for using FrogTape® products. All opinions, projects and ideas are based on my own experience.

Guest Room/Nursery Diagonal Wall Paint Refresh

Our guest room was painted just a few years ago (and the color is a mix of several leftover paints, but I’d say it’s close to Benjamin Moore Smoke). And an occupational hazard of loving DIY and decorating is that walls wind up with tiny nail holes everywhere (they’re just holes! It doesn’t deter me from decorating and doing what I love when it’s such an easy fix). The walls also had some scuffs, etc. And well, with welcoming a grandson into our lives soon, I wanted to freshen up the guest room a bit and to add a few nursery details. So, time to freshen up those walls. 

Guest room before – not bad at all! But I want to freshen up the room, make room for a guest baby too!

poster bed with curtains, turquoise and orange, do it yourself, bedroom makeover

I really like the existing color. So I didn’t want to completely start over. I decided to add Valspar Sandstone Gray to the main areas that needed “freshened up”. How did I do it? By keeping the existing wall color on one wall completely and painting the opposing/opposite wall the new color. Then, the other two walls got a bit of a fun treatment. New color where I patched the nail holes, existing color remains on the bottom half where I didn’t have nail holes. 

Yes, that means a diagonal design. Simple. I am really loving the result!

How did I do the diagonal wall treatment? With…

Diagonal Wall Paint Design Tutorial 

  • FrogTape® Multi-Surface
  • string
  • thumbtacks
  • paint

Note: I tackled this project before sunrise (crazy!) but I couldn’t sleep (it does feel like a productive day when you accomplish so much before lunch). Anyway, please pardon the shadows in the tutorial photos. 

I attached string to the upper most corner of the wall with a thumbtack. Then did the same on the opposite bottom corner of the room.

Diagonal Wall Paint Design Tutorial

I used the string as a guide for placing my FrogTape. 

Diagonal Wall Paint Design TutorialDiagonal Wall Paint Design Tutorial

I used my thumbnail to burnish the edge of the tape that would meet the paint. 

Diagonal Wall Paint Design Tutorial

Removed the thumbtacks/string.

Diagonal Wall Paint Design Tutorial

Then Painted the upper halves of the walls. Two coats. 

Diagonal Wall Paint Design Tutorial

While the second coat was still wet, I removed the FrogTape and allowed the paint to dry before re-decorating. 

Diagonal Wall Paint Design Tutorial

I repeated the same steps on the opposite wall.

Diagonal Wall Paint Design TutorialDiagonal Wall Paint Design Tutorial

I really love the way I still have the original color but it’s updated, fun and freshened up!

Diagnonal Wall Paint Design @diyshowoff Diagnonal Wall Paint Design @diyshowoff

See the full guest room/nursery reveal here

combined guest room nursery reveal @diyshowoffDIY nursery wall decor at diyshowoff.comeasy diagonal wall paint design tutorial @diyshowoffpainted craft box DIY at diyshowoffDIYShowOff Michaels Makers back to school book ends feature

FrogTape Blog Squad

Disclaimer: I received compensation to complete this project for using FrogTape® products. All opinions, projects and ideas are based on my own experience.

Chalk Finish Paint Recipe

I’ve been working on a much needed laundry room makeover (I know! What the heck! We just recently revealed an open pantry makeover and a sweet bathroom transformation). We’ve been busy! But you’re about to get a laundry room sneak peek! As a member of the Lowe’s Creative Ideas team, I had the opportunity to whip up a batch of homemade chalk finish paint and the laundry pedestals I built just happened to be ready for a coat of paint. 

DIYShowOff Laundry Room Pedestals

Note: My laundry pedestals are an Ana-White plan and my first ever real DIY build. What a challenge to say the least! But I’m happy to say: I’m so glad it’s just done! It doesn’t look half bad! It’s functional! My new washer and dryer are at just the right height and I love the addition of a little storage space just underneath. Perfect fit for baskets, laundry baskets too!

DIY laundry pedestal

Chalk-Finish Paint Recipe

DIY Chalk Finish Paint Recipe at DIYShowOff

You’ll need:

Chalky Finish Paint Materials

  • Valspar Signature latex flat paint or latex paint with built-in primer
  • Plastic paint bucket
  • Stir sticks
  • Plaster of Paris
  • Plastic measuring cups (do not reuse for food)
  • Water (use cool, not warm)

How to mix it up:

1. Mix 1/3 cup of plaster of Paris with 1/3 cup cold water in a plastic bucket.

DIY chalk finish paint tutorial

+

DIY chalky finish paint tutorial

2. Stir until completely smooth. 

3. Mix with one cup latex paint and stir completely.

+

how to make DIY chalk finish paint

4. Paint!

chalk finish paint

* Makes enough chalk finish paint for one coat for a 6-drawer dresser. Should not be stored and reused. (Although I did cover and re-use without problem for touch ups after installing the washer and dryer.) For smaller projects, mix less using these proportions, mix more for larger projects. Nontoxic.  To dispose, let dry completely in the container before disposing in trash.

DIY laundry pedestal

What I think:

I have to say, I’m really impressed. I love how smooth it brushes on. I love the chalky-finish. Most of all, I LOVE that primer isn’t needed. I decided on black for the laundry pedestals…

do-it-yourself laundry pedestal


{you’ll have to wait on the rest of the laundry room details but coming soon!}

and I then I moved on to painting over a hunter green console table…

DIY-chalk-finish-paint before and after

and dry-brushed it onto the legs of my painted upholstered chairs. 

DIY chalk finish paint, dry brushed

  • Easy to make!
  • No primer!
  • Great coverage!
  • Pretty finish!

What do you think? I’d say it’s a success and will definitely be using this recipe again on other projects in the future! 

More DIY ideas at Lowe’s Creative Ideas, follow Lowe’s on InstagramPinterest and sign up for the Creative Ideas magazine and app!   LCI

*Disclaimer: As a member of the Lowe’s Creative Ideas Creators and Influencers network, I received a Lowe’s gift card to complete this challenge. As always, all ideas and opinions are in my own words. The blog post above is what worked for me. Results may vary. Remember to work in a well-ventilated area and to take the proper safety precautions.

Easy DIY Projects – The Power of Paint

The Power of Paint: Paint and FrogTape (used in each project shown below) are my #1 DIY go-to materials. 


When it comes to transforming our house into a home we truly love that reflects our lifestyle and personality, “do-it-yourself” projects are a great budget friendly option. Not only can the result be a gorgeous home, but each DIY accomplishment can be empowering.

Our favorite saying around here is ‘imperfection adds character’ but really, I love that DIY projects are rewarding and motivating for creating a comfortable home for my family. There are no rules. YOU can make our home the way you want it to be. Paint has played a huge part in making over our home. 

So there you have it…paint is my #1 favorite DIY material. What’s yours?
 

*This sponsored by FrogTape. FrogTape provided by Shurtech. The opinions are completely my own based on my own experience.

 FrogTape Blog Squad

Show Your Colors

With so many before and after projects going on around here…and you know how I’m always so excited to share…well, sort of like DIY Show Off, MyColortopia.com has a new feature for readers to celebrate their completed projects. It’s called Show Your Colors and not only can you show off your before and after photos, but you’ll inspire others with your DIY talents. Sounds fun, right?

choosing paint colors, paint color inspiration tool, how to choose a paint color

This is how it works:

Remember the apartment kitchen area before?

apartment kitchen before

Blah. But after a lot of painting, the cabinets, countertops, walls and trim have a fresh new look:

Rustoleum Cabinet Transformations pure white

and a sneak peek of something you haven’t seen yet involving more paint {details coming soon}…

painted accent wall

It’s super easy. Create and log in to MyColortopia.com, click the “Befores &Afters” tab and upload up to 4 pictures of your before and after room makeover.

All done. You’re all set to browse the entire gallery of before/after photos. The MyInspiration tool will match your favorite colors. And you can share via social media your project or your selected favorites. Super cool!

There’s so much more information at My Colortopia.com to kick start inspiration for your next room makeover including a blog post full of ideas written by some of our favorite talented DIY bloggers. Check it out!

I have been sponsored by Glidden brand paint to write this post but the thoughts and opinions expressed are my own.

DIY Ombre Balusters

Ever think about those boring stair balusters?

Martha Stewart

Meet: Angie from

Angie's Roost

Angie and her husband bought a 100+ year old home in desperate need of some love and blog about the misadventures in DIY home improvement.  Angie’s project was the Pinterest-Martha-Stewart-inspired image above and here is her DIY result:

Gorgeous! When Angie first started this project, she hadn’t intended to use the same blue color scheme as in the Martha Pin-spiration photo but after color searching, a blue palette was the obvious choice for a home filled with many blues and sea foamy colors.

Her pictures are just as inspiring. But Angie does warn: this project is HARD for her 100+ year old, un-square, un-level home.

First step, choosing the colors:

Angie’s tips for choosing colors: So many blues! I’m addicted to the Valspar color options at Lowes, so I started the color selection process by selecting one section of the blues and bringing home ALL the chips in that section. I then chopped them up so I could “play paint chips”. And I played, and I played and I played some more. I originally thought I wanted to choose 16 different colors, one color for each of our balusters. But choosing 16 blues and putting them in ombre order proved way too difficult. Choosing 8 colors was hard enough. In the end, I chose two sets of three chips (you know…the paint chips come with 3 different colors on them with their own little ombre-ness to them). Then I just found two more colors, one really dark one and one really light one, to round out the field of 8.

It doesn’t take much paint. Paint samples (Valspar $2.94/each) are perfect for this project.

Angie didn’t want brush strokes to show up on the finish and used 1″ foam brushes to apply the paint. Three coats each.

So pretty! Next step was installation. The balusters did get a little scuffed up by the table saw and during installation, but it is far easier to touch up a little paint here and there afterwards than to paint them in their entirety after installing.

Before:

Amazing after:

The balusters are a great complement to DIY ski map art and pictures on the entry gallery wall.

Again, before (old homes have so much character but they generally do look like this at one point in their history)…

And the beautiful, fresh and light after…


Want to see more DIY (home + wedding) from Angie? Pop over, introduce yourself and take a look around at Angie’s Roost.
DIY Show Off - FacebookDIY Show Off - TwitterDIY Show Off - PinterestDIY Show Off - Feed