How to Get Rid of a Raccoon in the Attic (The Humane DIY Way)

What worked, what didn’t, and how I peacefully evicted our uninvited guest.

A raccoon mama moved her family out after we made the attic a little less cozy. (No traps, no harm, just DIY persistence.)

How I Got Rid of a Raccoon in the Attic (Without Expensive Traps)

Volume up! Because this guest wasn’t on the reservation.

Last spring, A mama raccoon in the attic at the studio made herself right at home. Unfortunately, her new home was directly above the guest bedroom… and the nighttime noises were hard to miss.

Thankfully, our actual guest was incredibly understanding (shoutout to the real MVP). But the situation had to be handled quickly, humanely, and ideally without calling in an expensive wildlife service.

The Clues: Scratches, Sounds, and a Rooftop Break-In

If you’ve ever had a raccoon in the attic, you know the sounds aren’t subtle. One night, a guest messaged me:

“There’s something in the ceiling. It’s chirping.”

Sure enough, it sounded like something was having a party in the attic crawl space.

I investigated and spotted muddy paw prints (not visible in photo) and scratch marks going up the white drainpipe and my freshly painted exterior straight to a gaping hole near the soffit and fascia at the roofline. Raccoon. Of course.
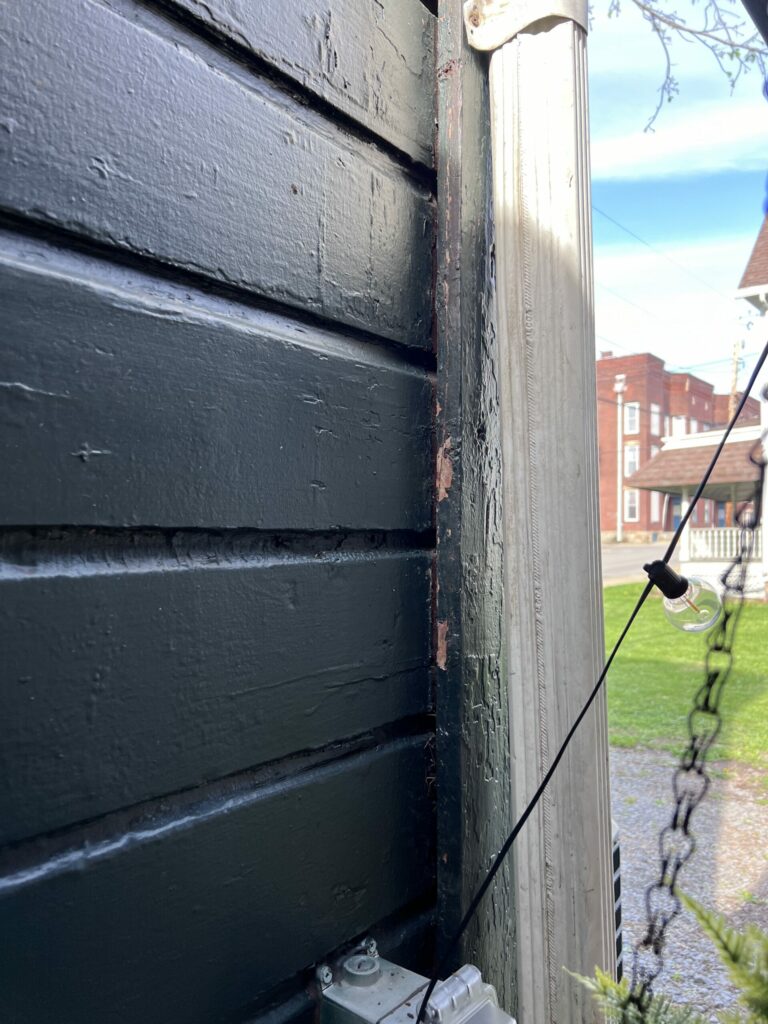
Scratches and paw prints on siding beside a white drainpipe from raccoon climbing
Roofline damage near white gutter where raccoon entered attic through soffit

Professional Help? Pricey.

I called a few local wildlife services and got the scoop:

  • Trapping fees were high. They’d set, check in a few days and if she didn’t take the bait,
  • prices went way up if they had to go into the attic.
  • There was no guarantee they’d catch her, especially with babies involved.

So… I went into research mode.

What Didn’t Work: Classic Traps

We placed a humane trap near the entry point and tried a few bait combinations:

  • Tuna and eggs
  • Peanut butter and marshmallows
DIY marshmallow and banana sheep on a plate as a humorous raccoon bait idea

One of our light-hearted bait attempts. Marshmallow banana sheep. Spoiler: she was not impressed. Humor meets trial and error.

Just kidding on the presentation! haha! But I did try peanut butter and marshmallows.

Ps. I didn’t want to use tuna or cat food…I didn’t want to catch a feral stray or neighborhood cat.

She didn’t take the bait. Not once. I later read that raccoons who’ve been trapped before are trap-shy and this clever mama seemed to know the drill.

Humane raccoon trap near downspout with peanut butter and marshmallow bait

How I Got a Raccoon in the Attic to Move Out Naturally

My guest was leaving for the weekend. I had a small window to evict the unwanted raccoon-squatter. Raccoons love quiet, dark, undisturbed spaces. So I flipped the vibe completely.

Here’s what I used to encourage a peaceful exit:

Young Living peppermint essential oil bottle held on a wooded path
Peppermint essential oil: part of my humane DIY raccoon eviction plan.

*I always have Young Living peppermint essential oil on hand … it’s one of my favorites for DIY, wellness, and even (apparently) raccoon evictions. Here’s my YL referral link if you want to try it too. Just a few drops in the diffuser and the attic smelled like a spa (to me but not a fan favorite for raccoons).

A full-on raccoon rave. Minus the fun.

And… it worked. That night, she packed up her babies and moved out.

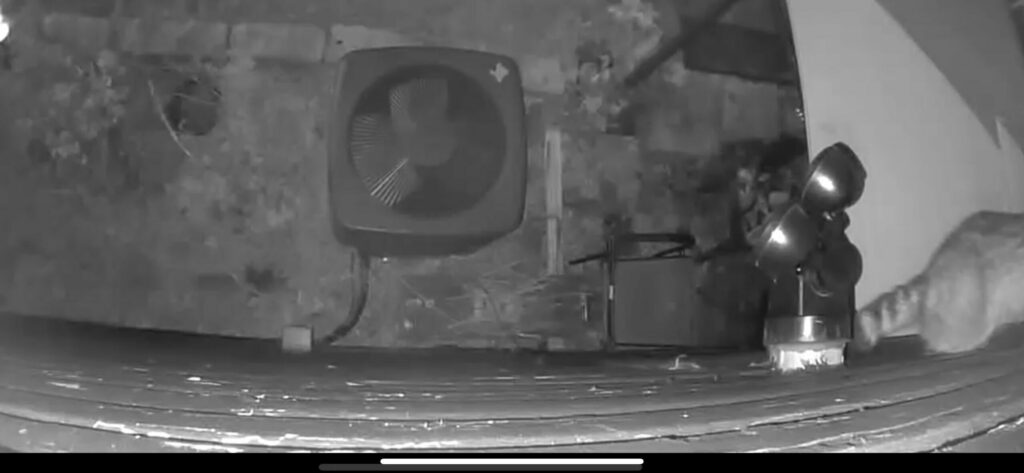
Raccoon climbing siding next to spotlight at night, captured by security camera

🎥 Watch it happen: Mama raccoon moves out with her baby (caught on cam!)

What We Did Next: Prevention Mode

Once she was out:

  • We sealed up the hole near the roofline (there was plans for a new roof in the works anyway so that also helped in the long run).
  • Did a full check of other outdoor structures (sheds, etc.). I read that they usually have a back up plan or two. (In fact, this is in a downtown neighborhood. The abandoned house next door was demolished. I have a feeling that was the original labor and delivery den and since it was no longer there this year, she made her way to her plan B…my attic.)
  • Gave the neighbors a heads-up. (Raccoons are sneaky and resourceful!)

Raccoon Prevention Tips (Humane + DIY-Friendly)

These are all helpful ways to prevent a raccoon in the attic from returning year after year.

  • Seal any small gaps around soffits, vents, or eaves—especially in spring.
  • Use peppermint essential oil or ammonia as deterrents (not poisons).
  • Place motion-activated lights near potential entry points.
  • Play a radio in the attic or unused spaces to discourage nesting.
  • Trim tree branches that could act as raccoon bridges to the roof.
  • Try a humane trap if you’d like to first.
Collage of DIY raccoon deterrent methods including a raccoon, roof damage, peppermint essential oil, and a text that reads "How I Got Rid of Raccoons in the Attic (No Traps) DIY Tips That Actually Worked"
Pin for later…Humane DIY Raccoon Removal Tips

Final Thoughts (and a Gentle Disclaimer)

We got lucky. The mama raccoon moved out peacefully, and no one (no guest, human, or critter) was harmed. This DIY method was a last resort before calling in pros, and it worked because we acted quickly and respectfully.

If you’re dealing with something similar:

  • Be patient.
  • Act early in the season if possible.
  • When in doubt, call a licensed wildlife removal expert.

In addition, for more info on humane wildlife removal, I also found this guide helpful during my research: Humane World: Raccoon Removal Tips

Disclaimer: I’m not a pest control pro. I’m just sharing our personal experience in hopes it helps someone else avoid a costly or stressful situation. We chose humane, non-harmful deterrents and were mindful not to separate a mother from her babies.


Have you had an unexpected attic guest? Share your experience or tips in the comments—I’d love to hear what worked for you!

Some of the links above are affiliate links. That means I may earn a small commission (at no extra cost to you) if you decide to purchase something I’ve linked. I only share what I’ve personally used or researched thoroughly.

Build a Beautiful Pallet Flower Planter + Blog Updates

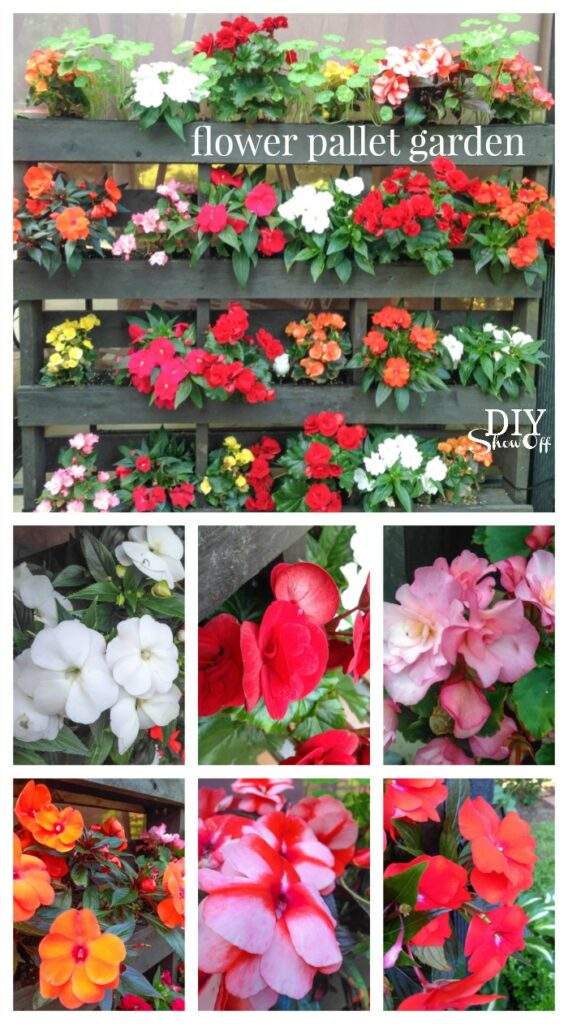
Vertical pallet garden full of colorful flowers.

A Quiet Comeback + A Favorite DIY Revisited

There’s something comforting about returning to familiar places. Especially the creative kind and I’ve missed this space. After a little time away from blogging, I’m finding my rhythm again and thought I’d start by dusting off a simple, cheerful project from the archives: a DIY pallet flower planter. It’s a reminder that sometimes beauty blooms best when we revisit what we’ve already begun.

Materials I Used for a DIY Pallet Flower Planter

  • 1 kiln-dried pallet (in good condition)
  • Scrap wood. Here’s what I grabbed: (1) 1×4 board, (2) 2×4 boards, (1) 4×4 block
  • Exterior nails or wood screws
  • Wood stain (optional, for color and finish)
  • Clear protective topcoat (weather-resistant)
  • Heavy-duty staples or staple gun
  • Fabric weed barrier or landscape fabric
  • Potting soil (suitable for flowers)
  • Seasonal flowers of your choice
flower pallet garden

How to Make a DIY Pallet Flower Planter

Step 1: Choose and Prep Your Pallet
We had plenty of pallets on hand and selected a kiln-dried pallet marked “HT” (heat-treated), which indicates it’s safer for garden use compared to chemically treated wood. We gave it a thorough scrub with bleach and water to clean off any dirt or residue (important if you’re planting anything edible or placing it near your home).

Step 2: Remove Boards to Create Planting Space
Using a pry bar, we carefully removed three of the horizontal boards from one side of the pallet. This helped open up the structure, creating more vertical room for taller flowers to grow freely.

Step 3: Sand and Prep the Wood
Next, we sanded down all rough edges and splinters using medium-grit sandpaper. I also hammered in any protruding nails to ensure the surface was smooth and safe to work with, especially important for a garden piece that’s often handled.

Step 4: Add Stability and Feet
To give the pallet a flat base, we attached scrap 1×4 boards to the bottom edges of each side, creating a shelf-like structure. This gave us a place to attach “feet” made from more scrap wood. We experimented with adding a caster to one side for mobility, but when that didn’t work as well as we hoped, we opted to secure the pallet to the side of our patio swing instead. You could also anchor yours to a deck railing or set it securely into the ground.

pallet garden tutorial

Step 5: Stain and Seal the Wood
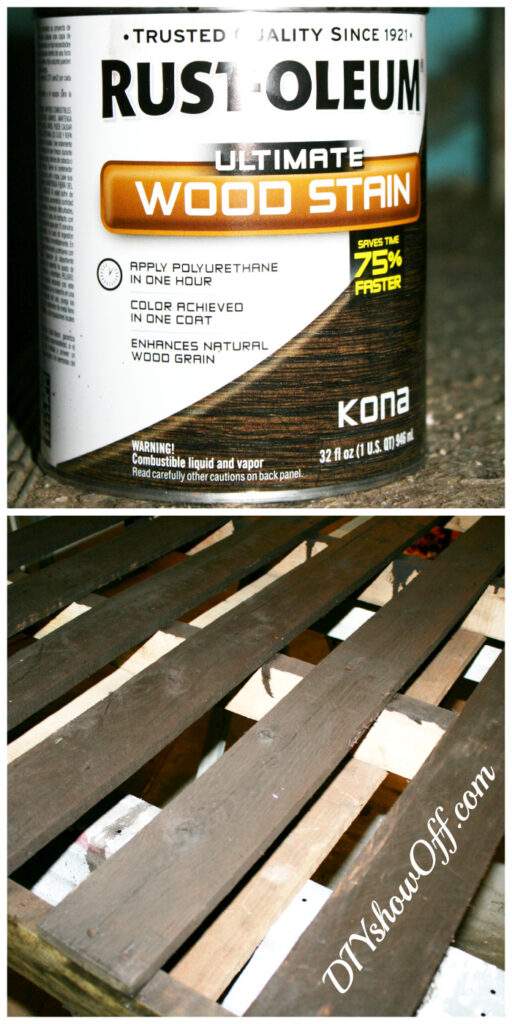
I stained the pallet using Rust-Oleum Wood Stain in Kona, applying it with a brush and wiping away the excess. Although the stain dries in about an hour, I let mine cure for a few days before sealing it. Once dry, I gave the entire pallet a quick coat of clear protective spray to help it stand up to the elements.

rust-oleum stain and pallet

Step 6: Cut Fabric for Planting Pockets
To create planting pockets, I used newspaper and junk mail to make a simple pattern. Be sure to account for folding the edges under and covering the sides of each pocket. Once the pattern was dialed in, I used it to cut my fabric weed barrier to size.

weed barrier planter pockets on pallet garden

Step 7: Staple the Fabric Weed Barrier
I folded under the raw fabric edges for a cleaner look and then stapled the fabric in place between the pallet boards, forming deep planting pockets. The corners were a little tricky—I used a trial-and-error folding technique and may have gotten a bit staple-happy. My final setup created 12 planting pockets in total.
Step 8: Set Up Your Planter
Once everything was secure, I moved the pallet into its final position. You can lean it, secure it to a railing, or anchor it in the ground depending on your space and preference.

DIY flower pallet garden tutorial

Step 9: Fill and Plant
Time to get planting! Fill each pocket with quality potting soil and your favorite flowers or herbs. The fabric allows for natural drainage, helping prevent overwatering.

watering flowers in vertical pallet garden

Finished and Flourishing

Ready to bloom! I love how this project gives new life to old materials and brings a pop of color to any outdoor space. If you give it a try, I’d love to see how yours turns out! Tag me on social media @DIYShowOff or leave a comment below!

vertical pallet flower garden

Let’s Show Off Your Creativity!

Have a DIY project you’re proud of? Whether it’s a craft, home improvement idea, seasonal decor, or something uniquely creative, I’d love to feature it here on the blog or on social media! Sharing inspiring ideas is what this space is all about and your creativity could spark someone else’s next project. Fill out the form below to submit your tutorial, photos, or story. Let’s inspire each other!

Suite Thyme Before and After Makeover: Full Tour

Welcome to Suite Thyme, a lovingly restored historic home nestled in the heart of Butler, Pennsylvania! What began as a vision for a cozy, welcoming short-term rental has blossomed into a full-scale transformation filled with character, charm, and thoughtful DIY design. I wanted each room in this 100+ year-old house to create a relaxing, stylish stay for our guests. Read along for the features of the full Suite Thyme before and after makeover.

I’ve created collages of each space and linked to the before-and-after transformations. From the inviting living areas to the serene bedrooms, you’ll see how I’ve blended vintage elements with modern comforts to create a unique guest experience. I love having complete creative freedom and enjoyed the “wow” change from what was to how it looks and feels now.

Explore the transformations below to discover how Suite Thyme combines historic charm with contemporary design to offer a memorable experience. Whether you’re seeking inspiration for your own home or looking for a delightful getaway, I hope these makeovers spark your creativity too!

Suite Thyme Before and After Makeover: Room-by-Room Collages

If you’ve been following along, you know this Suite Thyme before and after makeover has been such a rewarding project from start to finish (or always evolving).

Collage of Suite Thyme Airbnb design featuring modern boho interior decor, updated kitchen, soaking clawfoot tub, cozy bedroom, and historic green exterior in Butler, PA.

Suite Thyme Before & After Home Makeover Series: Explore #helloredreno

Before and After Transformation

Much of Suite Thyme’s design journey has been shared in my #helloredreno series, but there have been some exciting exterior updates too, including all new windows and a completely fresh look for the outside of the home.

You can’t always see it in photos, but the red paint (which wasn’t original) had become weathered and was peeling badly. And if you’re like me, when a project comes with a big price tag, you want to be wowed by the results. That’s why choosing a new color was such a big deal. I am absolutely over the moon with the decision to go with Benjamin Moore’s Black Forest Green. It’s stunning! Don’t you think?

This late 1800s property has quite a history. We purchased it back in 2017 from a lawyer who had used it as his office for over 45 years. I’ve even heard there was maybe an antique shop here at one point. One of the old deeds I found shows a transaction from 1912. I’d love to dig up more details someday. It’s such a charming little spot, sitting proudly on a corner lot in the heart of the city.

The transformation has been a lot of work, but every step has been so worth it.

Before and after collage of Suite Thyme’s exterior makeover, featuring the transformation from weathered red siding to bold green paint, updated entryway, and cozy outdoor seating in Butler, Pennsylvania.
Before and after collage of Suite Thyme’s kitchen and dining area makeover in Butler, PA, featuring open shelving, stainless steel appliances, wood accents, warm leather seating, and a thoughtful guest journal with tea.
Before and after collage of Suite Thyme’s bathroom renovation in Butler, PA, featuring a clawfoot tub restoration, eclectic boho shower curtains, hex tile flooring, and a painted green dresser vanity.
Before and after collage of Suite Thyme’s living room and bedroom transformations in Butler, PA, featuring moody accent walls, a canopy bed, velvet textures, boho-modern styling, and inviting seating areas.

Curious about the full renovation journey? Most of these spaces were transformed as a part of my ongoing DIY series. Explore the #helloredreno makeover achieves here.

Design Update

What’s next for Suite Thyme? There are exciting plans in the works! We’re hoping to purchase the adjoining property to expand the backyard and improve parking. You may have seen the demo of the abandoned house next door. Fingers crossed it all comes together!

Also on the list: a new metal roof, a concrete patio, and a little landscaping TLC. Indoors, I’m dreaming of a fresh kitchen backsplash and a bedroom refresh. It’s hard to believe how far this little home has come or that it’s already been creating special memories for so many travelers.

Love what you see? You can actually stay here! Book your stay at Suite Thyme on AirBnB right here and experiences it’s charm in person!

Love the Look? Stay Connected or Pin for Later

Thanks so much for taking a look around Suite Thyme! Each room has been a labor of love, and I’m so proud of how far it’s come. Whether you’re gathering inspiration for your own space or planning a visit to Butler, I hope you found something that sparked an idea or made you smile.

Want to see more behind the scenes or stay updated on future DIY projects and room refreshes? Be sure to follow along. Don’t forget to pin your favorite space! You can book Suite Thyme on AirBnB

DIY Essential Oil Perfume

DIY essential oil perfume recipe using Young Living oils – signature scent gift idea

Create your own essential oil perfume using Young Living oils

If you love thoughtful, handmade gifts, this DIY essential oil perfume recipe is a perfect fit!
Bookmark this post and save these natural perfume ideas to create your own signature scent or craft a custom gift for someone special.

How to Make Your Own Essential Oil Perfume

DIY essential oil perfume recipe using Young Living oils – how to create your own perfume

Want to create a scent that’s all your own?
Follow this DIY signature scent recipe using Young Living essential oils to make a custom perfume…naturally.

Steps:

  1. Choose your scent (see ideas below).
  2. Decide on a spray or roll-on bottle.
  3. Follow the recipe.
  4. Let it settle for 24–48 hours.
  5. Shake gently, apply, and enjoy your natural fragrance!

💡 Don’t forget to jot down your blend. When you love it, you’ll want to recreate it!

Supplies:

Referral links included where noted.

DIY essential oil perfume recipe using Young Living oils – DIY perfume supplies

Understanding Scent Notes:

DIY essential oil perfume recipe using Young Living oils – scent note examples

Scent Categories:

  • Fruity
  • Floral
  • Woodsy
  • Herbal
  • Spicy
DIY essential oil perfume recipe using Young Living oils – DIY scent categories

Scent Notes Explained:

The best perfumes balance scent layers:

  • Base notes (20%): woodsy, balsam
  • Middle notes (50%): floral, fruity, green, spicy
  • Top notes (30%): herbal, citrus, aromatic
DIY essential oil perfume recipe using Young Living oils – notes explained

DIY Signature Scent Recipes (Inspired by Classic Perfumes)

Try these Young Living oil blends inspired by timeless fragrances:

  • Aramis Cologne Recipe
  • Giorgio Armani Inspired Blend
  • Chanel No. 5 Inspired Blend
DIY essential oil perfume recipe using Young Living oils – armies cologne
DIY essential oil perfume recipe using Young Living oils – giorgio armani
DIY essential oil perfume recipe using Young Living oils – chancel no. 5.

Ready to Get Started?

Not a Young Living member yet?
We’d love to help you get started! Use our referral link:
👉 Young Living Sign-Up
Our family has used these oils daily for almost 10 years. Have questions? Message me on Facebook or email. I’m happy to help!

DIY essential oil perfume recipe using Young Living oils – get started

Gift-Worthy Perfume Bottle Ideas

(Referral links)

More DIY Perfume Recipes to Try

Comfort & Joy roll on

comfort and joy rollon tutorial

Happy Unicorn Blend

unicorn essential oils make and take DIY roll on blend
magic unicorn essential oil blend roll on DIY recipe

Follow on Facebook and Instagram!

DIYShowOff is back on Facebook! Follow along here:

DIYShowOff Facebook

DIYShowOff Instagram

DIYShowOff Pinterest too!

DIY essential oil perfume recipe using Young Living oils – signature scent gift idea

DIY Halloween Floral Skeleton

DIY Halloween Floral Skeleton tutorial

I am so in love this decadent and decay theme for adding a touch of Halloween class to the front porch! It’s a skeleton with beauty and style and solar fairy lights!

What I gathered:

Supplies:

  • artificial fall florals
  • 36″ skeleton
  • clip on butterflies
  • hot glue
  • solar fairy lights

Tools: hot glue gun, wire cutters

What I did:

Using wire cutters, I separated some of the florals and removed stems if needed. Then simply secured fall floral pieces and arrangements and accents onto my skeleton using hot glue. A flower crown, some florals over the rib cage and a few tucked within, a wrist and ankle corsage. I added a few butterflies too.

Once that was complete and all of my florals were securely in place, I started at the bottom of one leg and worked my way up the skeleton (there is a LOT of wire so be generous with wrapping and even going back over an area) then back down to the other leg with the string of solar fairy lights.

I used a shepherd’s hook to display in a planter where I could also easily tuck in the solar panel.

Decadence and decay!

Do you decorate for Halloween? Spooky? Creepy? Fun and cute?

Source List:

JoAnn Fabrics: florals and skeleton (after the fact, I also saw the same size skeleton at Family Dollar)

Amazon (affiliate links) ~ make your own kit with everything you need:

Easy DIY halloween floral skeleton decor tutorial

Farmhouse Exterior Makeover

Hello, DIYShowOff friends! If you’ve been a DIYShowOff follower, you’ll remember our farmhouse from back in the day. Ready for a farmhouse before & after exterior update and makeover? It’s undergone the biggest before and after exterior makeover to date. It’s hard to believe it’s the same farmhouse. Of course there are still projects on the list (porch railing, landscaping, etc.) but our property has never looked better! The exterior is so pretty and the yard is now an oasis, our personal retreat.

diyshowoff exterior farmhouse makeover

Farmhouse Before

Before…old windows, faded siding, back doors with awnings, sidewalks and a lack of landscaping. An old dilapidated grape arbor.

BEFORE:

farmhouse before

We definitely got the side eye when purchasing this fixer upper but my Mr. DIY and I saw the potential.

After: French doors, new windows, new siding, a new metal roof, concrete patio, concrete stairs and a stamped stained concrete pool deck and walkways were added, grape arbor rebuild. Years in the making!

AFTER:

farmhouse exterior makeover

Early Makeover Projects

One of the first projects was installing French doors where the single back doors were and removing the awning. Then came a patio and some landscaping.

back exterior farmhouse before

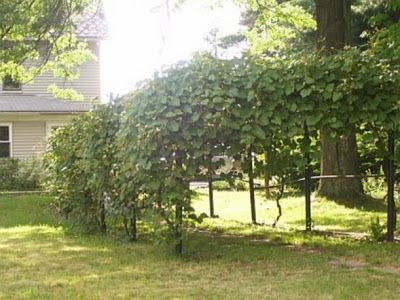
And a grape arbor gazebo makeover. Here’s the before:

grape arbor before

Pool Party

Then last year…a major update starting with an in-ground pool installation, stained & stamped concrete pool deck and patio. Check out our complete in-ground pool installation!

in-ground fiberglass pool patio

Welcome guests!

We have a new front door and porch! Our home didn’t have a front door (original was enclosed to create a ‘sun porch’) which we opened up into a home office when we got new windows. Original front door is in the wood sided addition shown below…

farmhouse addition

Here it is inside…

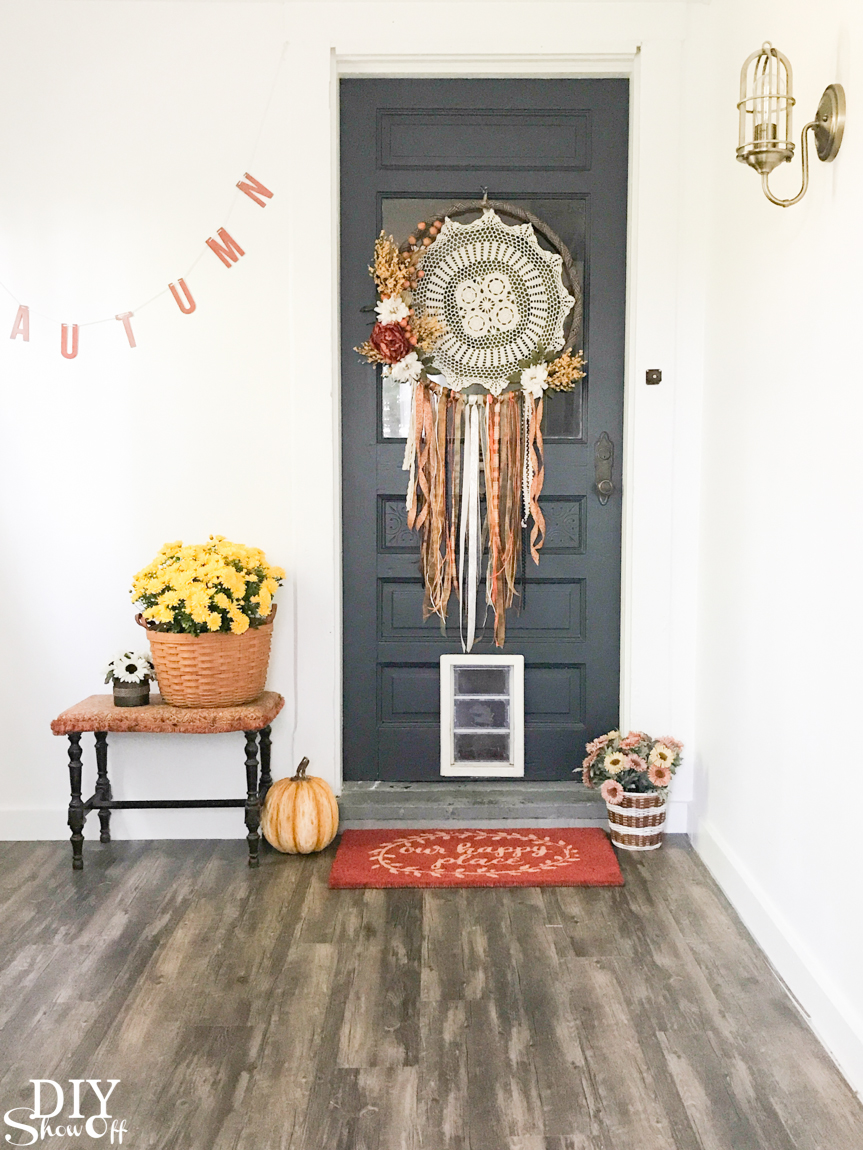
DIY fall autumn dreamcatcher door decor wreath @diyshowoff

Other side of the front yard…

farmhouse before makeover

BEFORE:

exterior door install

So we added a new front entry door and front porch leading into our family room. It’s still a work in progress with the need for railing and extending the sidewalk from bottom of stairs to the driveway but looking good!

dark home exterior front door

New Siding

Then new board and batten, cedar shake and ledge-stone (vinyl) siding for an amazing transformation for the biggest “wow”.

BEFORE:

exterior siding makeover before

AFTER:

board and batten siding

Siding is from CVS. Board and Batten color: Carbon Designer. Trim: Linen. Ledge stone siding is Arizona Sandstone and cedar shakes: Rustic Cedar Designer.

BEFORE AND AFTER different view:

carbon color board and batten siding before and after

Metal Roof

And a new metal roof on additions (keeping the original slate which is still in good condition in a copper color.

After (the transformation)

So, it’s been a minute. Okay, it’s been way longer. But I’m back! I’ve missed our connection. It’s so easy to get lost in the everyday, especially with how blogging has changed over the years and with losing my Facebook page to a hacker leaving me feeling defeated with the disappearance of years of hard work. Time to get back on the horse, ya know?! Time to catch up! I have so much more to share!


View this post on Instagram


A post shared by Roeshel (@diyshowoff)

What do you think? Big change, right?